Baking a cheesecake can be quite challenging, but your journey is about to become smoother with the insights shared here. You’ll gain the ability to address common cheesecake inquiries like “What causes cracks in my cheesecake?” and “Is a water bath essential?” Before you realize it, your cheesecakes will become the highlight of conversations in town.
Making the Crust and Batter
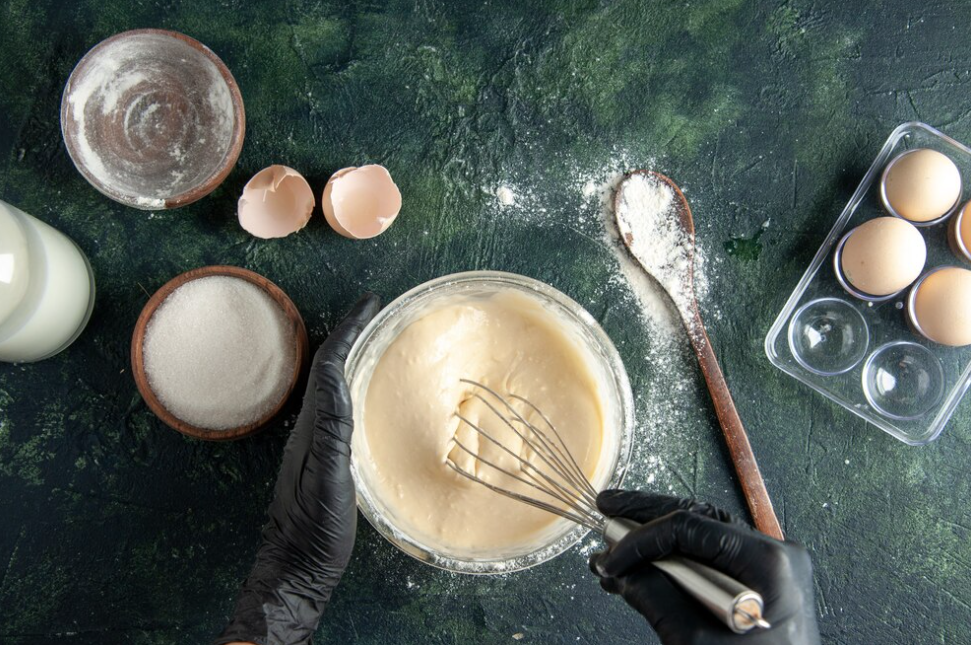
Optimal Mixing Speed for the Filling
What mixing speed is optimal for the filling? It’s advised to stay within medium speed when utilizing your mixer. This measure helps avert overmixing, which could lead to an excessive infusion of air into the batter. An excess of air and overmixed batter might give rise to undesirable cracks and bubbles on your cheesecake’s surface. It’s worth mentioning that a few bubbles are typically unavoidable. Yet, if an abundance of bubbles is evident atop your baked cheesecake, it indicates potential overmixing of the batter.
Swapping Ingredients for Fresh Flavors
Crusts
When it comes to experimentation, crusts are your canvas. Beyond the classic graham cracker base, a plethora of crust options awaits your creative touch. Crushed Oreos, buttery shortbread, or Nutter Butters can stand in as delightful alternatives. For a taste of innovation, consider Juniors Cheesecake in New York, famed for its delectable sponge cake crust.
Enhancing the Batter
Elevate your cheesecake game with simple yet remarkable adjustments to the batter. Upgrade the experience by incorporating crushed candies, cookies, or vibrant fruits into the batter just before baking. To achieve an artful fruit-swirled effect, puree your chosen fruit and gently swirl it into the already-poured filling resting within your prepared crust.
For a truly indulgent treat, incorporate whole fruit pieces, cookies, or candies. Just dice them into bite-sized portions and delicately blend them into the carefully crafted batter before gracefully pouring it into the prepared pan.
Exploring Unique Tweaks
Swapping out ingredients that are an integral part of the cheesecake filling can be a tad intricate. The fundamental ratios that underlie the cheesecake’s structure must be upheld to guarantee consistent baking and setting while avoiding curdling or a messy outcome. But fear not, it’s possible!
For instance, introducing extra eggs to the batter can induce a soufflé effect—causing the cheesecake to rise and then settle during baking. This can create a delightful, airy texture, perfect for those who seek it. If this intrigues you, delve into the pages of the Bravetart cookbook for her intriguing soufflé-inspired cheesecake recipe.
When it comes to flavors deeply woven into the batter, like pumpkin or raspberry, there might be a bit of trial and error involved. Typically, to fully capture the essence of the added ingredient, incorporating around ½ to 1 cup of it into the batter is a good rule of thumb. Often, you can enhance a standard recipe by adding a new element. However, for watery ingredients such as fruit juices, supplementing the batter with an extra 2-3 tablespoons of cornstarch is advisable. This ensures the desired firmness even with the presence of moisture when baking.
The Cheesecake Baking Process
The Necessity of a Water Bath
Baking a cheesecake without a water bath is strongly discouraged. Technically, it might be possible, but the risk of overbaking and the resulting unsightly crack on the surface increases significantly. Usually, dedicating just 30 seconds to set up a water bath is a small effort that pays off. However, I must admit, I’ve baked numerous cheesecakes with cracks, and their taste remains exceptional. So, if you truly wish to skip this step, it’s not a disaster, but I still advocate for using a water bath.
When opting for a water bath, remember to wrap the lower exterior of the pan with aluminum foil. This precaution ensures that no water seeps into the bottom of your cherished cheesecake!!
Monitoring Your Cheesecake’s Progress
Resist the temptation to open the oven door prematurely, unless a sunken or cracked cheesecake is what you desire! Refrain from opening the oven door until approximately 10 minutes prior to the expected completion time for your cheesecake.
Perfect Timing: Removing Your Cheesecake from the Oven
Look for a pale golden brown hue around the edges and a fully set center – devoid of any lingering moisture. Keep in mind that variations in oven temperature could result in your cheesecake being ready either ahead of schedule, right on time, or requiring an additional 5-10 minutes in the oven. As a result, begin checking for doneness approximately 10 minutes prior to the indicated time in the recipe.
Patience Pays Off: Allowing Your Cheesecake to Rest
After taking the cheesecake out, exercise restraint and let it be undisturbed for a minimum of 2 hours. Keep in mind to shield it from any substantial cold drafts, as exposure could lead to an unfortunate collapse.
Upon reaching full coolness, your cheesecake should then be transferred to the refrigerator – within the pan and tightly covered with plastic wrap. Aim for a minimum 4-hour chill, allowing flavors to meld. To prevent condensation, only cover the pan with plastic wrap after the cheesecake has completely cooled.
Once the cooling and chilling periods are complete, you’re ready to gracefully remove the cheesecake from the pan and arrange it for storage.
Post-Baking Care: Storing and Adding Finishing Touches
Storage Tips
Planning ahead? Baking your cheesecake in advance is a smart move. To store it, simply place it in the refrigerator for a span of up to 3 days or in the freezer for approximately 3 months.
For refrigeration, ensure the utmost freshness by covering your cheesecake with press ‘n seal or plastic wrap coated with a neutral oil (such as canola or vegetable oil) until the moment of serving.
If the freezer is your choice, take the extra step of wrapping your cheesecake tightly in plastic wrap. By adhering to these guidelines, your cheesecake can be safely stored for up to 3 months, ready to enjoy whenever you desire.
Cheesecake Cracks and Other Typical Concerns
Cheesecakes, delicate in nature, can be a challenge to perfect. Various factors can lead to mishaps during the baking journey. For an exhaustive guide detailing potential pitfalls and their remedies, refer to this comprehensive cookbook. In the meantime, let’s delve into a few prominent issues commonly encountered in the baking process.
Why the Cheesecake Crack?
| Issue | Cause | Solution |
|---|---|---|
| Overbaked Woes | Overbaking; cheesecake is too firm in the middle; top appears dark | Bake until cheesecake is set in the middle; a pale golden brown top indicates the right level of doneness |
| Absence of a Water Bath | Omitting the water bath or water evaporation; disrupts baking process | Use a water bath during baking; if water evaporates, avoid opening the oven door; remove when middle firms up |
| Inadequate Mixing | Insufficiently mixing ingredients; pockets of cream cheese or incomplete dissolution | Ensure thorough mixing of ingredients to prevent uneven distribution; dissolve elements completely |
The Causes of Sunken Cheesecakes
The middle of your cheesecake sinking is a puzzling occurrence with a few likely triggers.
Let’s explore these factors:
- Overmixing Effects: Frequently, this issue arises from overmixing the batter. The introduction of excessive tiny air bubbles that rise and escape during baking can lead to a collapsed center in your cheesecake;
- Prematurely Removed: Underbaking can be another cause, arising when the cheesecake is taken out of the oven too soon. Sometimes, even adhering to the recipe’s specified time isn’t enough due to oven temperature discrepancies. To prevent this, ensure the sides attain a gentle golden brown hue and the middle sets firmly before removing it from the oven;
- Untimely Cooling: Placing the cheesecake in the refrigerator before it cools entirely can also result in its center caving in.
Why is the CheesecakeToo Soft in the Center?
Discovering a soft center in your cheesecake can be attributed to specific factors. Here’s a closer look at the primary cause:
- Underbaked Dilemma: A center that’s slightly gooey typically results from underbaking. This can occur if you remove the cheesecake from the oven prematurely or if your oven temperature is too low. Fear not, as you can still enjoy your creation! To ensure a firmer center next time, consider extending the baking time by 5-10 minutes.
How Can I Improve the Appearance of My Cheesecake’s Sides?
- Parchment Paper Predicament: While parchment paper aids in effortless cheesecake removal from the pan, it might lead to less aesthetically pleasing sides due to compression. If you’re willing to experiment, you can skip using parchment paper in your next bake. However, my recommendation is to keep the parchment paper in place and employ a clever technique. A heated knife can be used to gently smooth out the edges, enhancing the overall appearance of your cheesecake sides.
Conclusion
Empowered with the knowledge from our all-encompassing manual for overcoming cheesecake bubbles and handling prevalent concerns, you’re now prepared to attain dessert excellence. Grasping the bubble-causing factors and putting the prescribed remedies into action will propel you toward crafting impeccable, velvety cheesecakes that garner admiration. Thus, it’s time to dive in, apply your newfound expertise, and bid farewell to any lingering cheesecake complications.